Master Closet: Getting Organized

All these unorganized areas in the house are making me go crazy during nesting time.

Take a look at our closet.


I promised my significant other that I would keep this area clean if he installed a custom closet system (he did this 2 years ago.)

I didn't mean to lie, but seriously, I am going through the closet every morning as fast as possible in order to get to work by 8.

I think if I had more time in the morning the closet would be nowhere near the disaster it is today.

Yeah, getting myself ready plus a 2 year old sleeping beauty is not an easy task. Add daycare drop off to that mix ohh the morning gets so much better! Can you tell my sarcasm?

Yesterday I worked on organizing the space.


{ removed the clothes }

{ moved pants over to the other side }

{ finally clean! }


It is such an improvement. I want to put small baskets at the top to hold some of the items we don't use very often...or even store out of season items.

Is it bad that I am loving the chalkboard baskets from Pottery Barn Kids for our master closet??

Sabrina Basket & Chalkboard Labels

I actually just want the labels. I think I can pick up some pretty inexpensive baskets from Target or Walmart.

Hmm...I smell a future project making these chalkboard labels!

The Crafty Scientist: Featured Blog


Today I am featuring a blog that I am growing to love, The Crafty Scientist. I might be a little bias (being a scientist and all…) but trust me her stuff is amazing. Mel is so creative and thrifty with her designs. I especially love her website. For all of you science buffs out there her tab titles are absolutely hilarious and fitting! Ok, my inner nerd might be coming out a little.

I am sharing {3} of her tutorials today.

{ T H E    W A T E R M E L O N   W R E A T H }


Are you in need of a summer wreath? Oh, I know my front door needs something...Another craft project to add to the list for my pre-maternity leave from work! Her watermelon wreath is absolutely darling and such the perfect touch for a summer door.

You can find Mel’s tutorial for the watermelon wreath {here.}

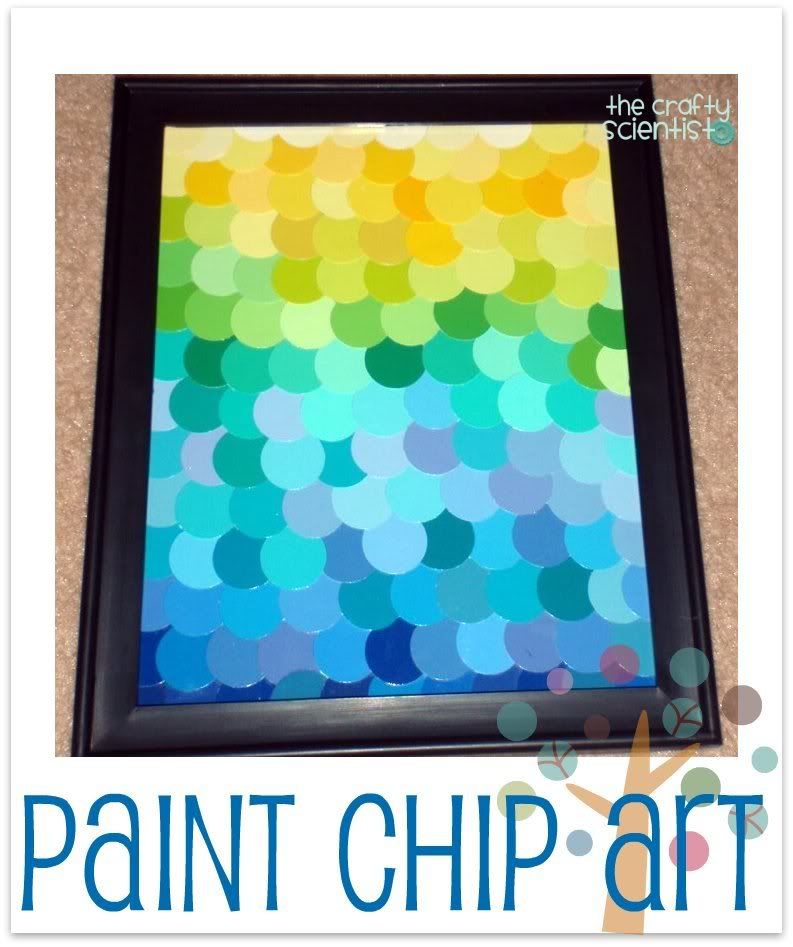
{ P A I N T   C H I P  A R T }


This is by far my favorite tutorial on Mel’s site. It is a popular one! I love everything about this project. The fact that you can get paint chips for free (awesome!) and create beautiful art is amazing. Her color combinations are so pretty and I really want to tackle this project in the future. I especially love her idea of using round paint chips – so smart and unique from the other paint chip artwork I’ve seen.

 { look at those color combinations - I'm in love! }

This is another project to add to the list!

You can find Mel's tutorial on paint chip art {here}.

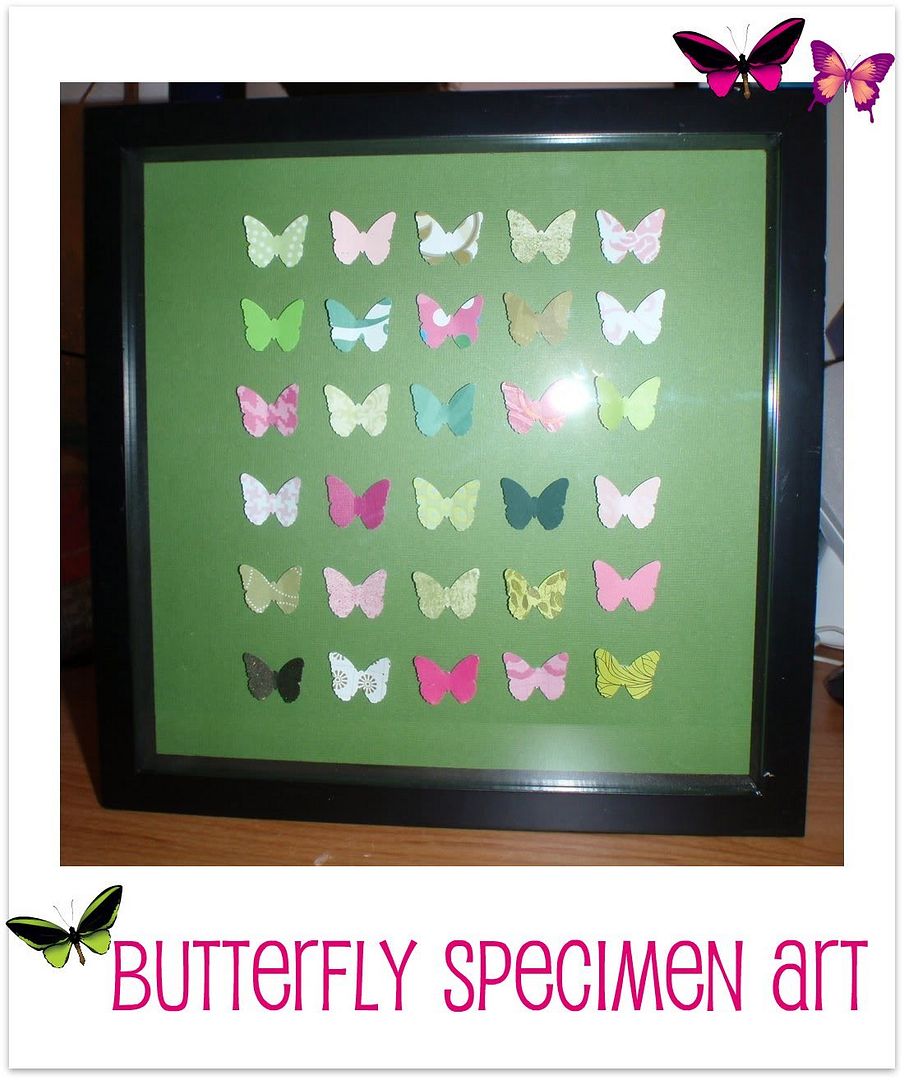
{ B U T T E R F L Y    S P E C I M E N   A R T }


How great is this artwork? My little girl is in love with butterflies and this will be such a great touch to her "big" girl room.

I love the idea of using various types of scrap paper and punching out fun designs to make art.

The possibilities are endless on what you can display like "specimen" art.

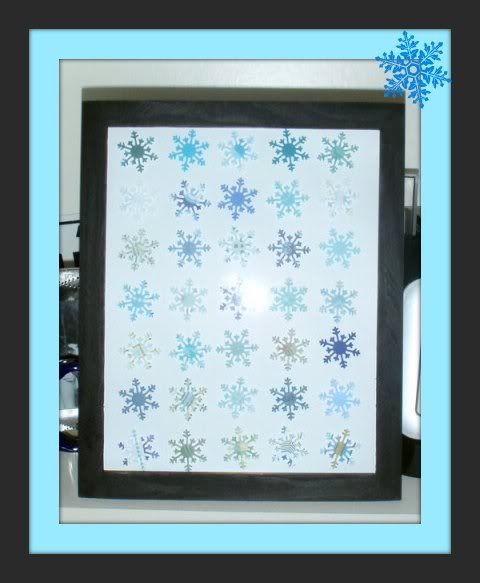
What about hearts for Valentine's Day or Snow flakes like Mel did here.


You can find the Butterfly Specimen Art {here}.

I hope you enjoyed a few of Mel's great tutorials. Check out her site for more tutorials and design ideas.


Goodie Bag: Sweet Shoppe Tutorial

{ T H E   G O O D I E   B A G }


I want to thank Emily at Jones Design Company for the wonderful idea of making your own goodie bags using a sheet of text weight paper. How smart and thrifty is that!?

I loved her idea of using a striped bag so I created my own striped bag that matched the party theme and added a Sweet Shoppe label on the front. 

Materials

:: Bag Template (found at the bottom of post) ::
:: Scissors ::
:: Hot Glue (or regular glue) ::

{STEP ONE}  Fold the bag template using the guide lines at the top of the sheet.


{STEP TWO} Using glue (I used hot glue) glue the overlapped piece of paper on the back of the bag.


{STEP THREE} Fold up the bottom (roughly 1in) and hot glue the bottom and ensure that it is sealed.

{notice the gap, make sure to hot glue this!}


{STEP FOUR} Cut off the white part on the top (guide lines)


That's all you need to do to make cute little goodie bags!


I included a generic label striped bag for download in yellow.

I hope everyone enjoyed the week of Sweet Shoppe printables and tutorials as much as I did.

If you have any questions relating to this party feel free to email {evelynkatedesigns@gmail.com} or leave a comment. I will try to get back with you as soon as I can!

If you are interested in a customized set of Sweet Shoppe Decor for printing I have the option available in my {shop}

Yes, the {shop} is finally open!

The official grand opening will happen later this summer but I wanted you to have a chance to get your own customized Sweet Shoppe Party set!

The Sweet Labels: Sweet Shoppe Printable

{ S W E E T    L A B E L S }

I have been slamming you with all of these printables! I hope some of you find them useful for an upcoming girls Sweet Shoppe birthday party, a bridal shower, or a baby shower.

Don't fear mothers of boys - there will be {free} birthday party printables in the future!

This is one of the labels I used for Evelyn's party.


I understand that many of you won't be serving the same treats nor have a child named Evelyn so I created a generic printable for you to write your own food choices.

Birthday Sweet Labels


{ D O W N L O A D   B I R T H D A Y }


Bridal Shower Sweet Labels


{ D O W N L O A D   B R I D A L }

Print these labels on white card stock (I used 80lb) and cut along the dotted lines. Fold in the center and adore your cute labels.


The Cupcake Wrapper: Sweet Shoppe Printable

{ T H E   C U P C A K E   W R A P P E R }

I created coordinating cupcake wrappers to go with the cupcake topper.


For the Sweet Shoppe Party I made both chevron and polka dot wrappers.

I've included the chevron cupcake wrapper as a free download.


Print this download at 100% and cut along the solid lines and glue.

This download includes two cupcake wrappers.

Another simple touch that makes a huge impact.

The Cupcake Topper: Sweet Shoppe Printable

{ T H E   C U P C A K E   T O P P E R }

How can you make cupcakes without dressing them with a cute topper? Kidding, normally I am way too lazy to take the time to make toppers.

I only make an exception on special holidays and birthdays.

I created these flag cupcake toppers for Evelyn's 2nd birthday.


Really simple and adorable.

I included the template I used to make these darling flags.


Just cut and glue the flag around a wooden toothpick.

T A  D A !

Now you have a cute cupcake topper to go with your yummy cupcakes!


The Welcome Sign: Sweet Shoppe Printable

{ T H E   W E L C O M E   S I G N }


This 8 x 10 sign welcomed guests as they entered the kitchen.

I like to think this sign set the tone for the party.

It incorporates the theme and is a cute touch to welcome guests.

I printed on 80lb card stock and put it in a large 8 x 10 picture frame that I found at my house.

Pretty inexpensive accent piece!

I updated this sign to be generic enough for people to use as a bridal shower or birthday party welcome sign.


{ D O W N L O A D   B I R T H D A Y }


{ D O W N L O A D   B R I D A L   S H O W E R }

If anyone knows how to include a PDF file without directing readers to a third party site for downloading please let me know. I think it would be 10x easier for everyone to access these printables without having to wait to download from another site.

------------------------------

Happy 2nd Birthday to my sweet little girl

Evelyn Kate

I remember the first words I said to her on that warm Saturday evening in June, "I'm so sorry I messed up your head." haha actually it is very funny that those were the first words I said. Her head went round after a few hours but I seriously felt so bad! She was in the canal for a long time and I wasn't doing such hot job pushing. Funny what you think of saying after 14 hours of labor and wacky meds.

She is so sweet and just started giving real kisses. She will only kiss you if you allow her to kiss your lips. So sweet.

Although at times she might be a handful for my 8 month pregnant body - I wouldn't change a second. Even the emotional breakdowns at the grocery store. Don't you love it when kids just know the greatest time to pull a tantrum?

Tonight we are going to grab some ice cream. She loves ice cream. Actually she loves anything that involves sugar.

Little Miss Evelyn Kate Happy 2nd Birthday :)

Sweet Shoppe Party - Kickoff!

{ S W E E T   S H O P P E   P A R T Y }

I am so excited for this week! I have several tutorials/printables to share with everyone!!!

Evelyn's 2nd Birthday was a success.

I can't believe she is 2!

It seems like yesterday we brought her home from the hospital.


Yes, with a head full of hair. It never fell out!

I wanted to share several photos from the party.


{she just woke up from her nap!}

{ welcome sign to greet guests }


{ the table }

{ some of the treats }

{ more yummy treats }

{ the sweet shoppe banner }

{ everything once again }

Most of these Sweet Shoppe decorations/tutorials will be included this week in a week of free printables and tutorials.   

Today I am kicking off with a tutorial I have done in the past - simply modified.

{ S M A L L    P O M     P O M S }


Some of you might remember my post from several weeks ago about how to make a {tissue pom pom}.

This time I used the same number of tissue sheets except I cut the tissue paper in half.

By doing this I created smaller tissue poms to decorate the party.

See how cute and dainty they look?


{ my husband hard at work making chocolate covered popcorn!}

This was an inexpensive way for me to decorate the kitchen (I had several packs of tissue sheets left over from Evelyn's 1st birthday.)

I hope everyone is ready for 6 days worth of free Sweet Shoppe printables and tutorials!

Oreo Truffles: Tutorial

{ O R E O    T R U F F L E S }


A coworker of mine metioned that I should make some truffles for Evelyn's 2nd Birthday.

She gave me this ultra easy recipe and says they are a huge hit.

They require only a few ingredients.


{ I N G R E D I E N T S }

:: bag of oreo's ::
:: 1 stick of cream cheese ::
:: chocolate (I used white) ::
:: shortening (optional) ::
:: food coloring (optional) ::
:: sprinkles (optional) ::

I made these treats today, one day before the party.

{ S T E P S }

{1} Crumble up all the oreo cookies (very fine) use a food processor if you have one {2} Mix room temp-ish cream cheese with the oreo crumbles (by hand) {3} Roll the mixture into small 1-1.5 in. diameter balls {4} Melt 12 oz of chocolate and 1 tbs of shortening in the microwave (make sure not to burn and stir often!) Total time for me was around 1:30 minutes. {5} Add food coloring to the chocolate. {6} Dip the truffle balls in the chocolate {7} Lay on a baking sheet covered with wax paper, add sprinkles and stick in the freezer/refrigerator to solidify {8} Remove after an hour or until they are hard and place in an air tight container.


How simple is that?

They look so adorable and they are amazingly delicious.

In addition to the truffles I made some chocolate covered pretzels.


Next week starting on Monday I will have a week full of {free} Sweet Shoppe Party printables! If you are hosting a little girls birthday or even a bridal shower and need some ideas check back next week.

Related Posts Plugin for WordPress, Blogger...