Evelyn's Baby Room

With all this talk about Harrison, I feel like I need to include our sweet girl in another post.

Her room (remodeled early 2009) took us roughly 3 months to complete. Why did it take so long? Well, we were getting use to the new tools and actually working with wood. This was Daniel's first time doing woodwork in any room.

This room inspires me to do a wainscotting theme throughout the house. Sorry Daniel, yes this means that there will be a lot more wainscotting to come!!!

This is how her room started...


I registered for the flower wall prints (below) at Pottery Barn Kids and was thrilled to get them from a family friend. I want to do something like this for Harrison's room but I don't want to fork out the $49/print. I have some ideas on how I can recreate this artwork - of course in a theme that works with the new baby room. Hmm, I'm thinking about a rustic looking 3 picture flag.

This is how Evelyn's baby - now big girl room looks today.


Another view...


Happy Friday!!

Entry Closet: Getting Organized

I am following through with my "getting organized" topic once every 1 to 2 weeks. This nesting thing is really getting to me.

This week I am taking on our front door closet. Boots have been piling up and scarves have been tossed on the top...Now that it is SPRING - yay, no more bulky Uggs to wear!! Please no more snow. I don't think I could handle another snow/ice storm.

This is the before...No judging allowed!

:: Evelyn wanted to be in this shot! ::

During...


I even found some missing purses!!!


And the After


Finally, we have a front door closet that we won't be embarrassed to use.

I moved all the bulky items to our master closet. We have a lot of empty space towards the back. This is the perfect spot for our out of season coats and shoes.

Happy organizing!

Upstairs Laundry

Having kids really changes things. There is a constant flow of laundry. With the new addition coming in a few months I know that the laundry will triple! My husband and I are constantly running up and down the stairs (not so much me anymore) carrying loads of laundry.

We finally decided that this needs to change. My upstairs has the perfect spot for a laundry room. Off our loft there is a large walk in closet. This space is next to "dead space" in one of the guest bathrooms. There is also a linen closet that is in this area. Late Spring of this year we are converting this space to a laundry room. No, we aren't doing this on our own...although my husband is going to help demolish the area (I think he just wants to break something.) We are leaving the venting and conversion of the laundry room to the experts.

With moving the laundry upstairs we are going to have an extra room that is off the garage. Since I don't have a walk in pantry, I am converting the old laundry into a pantry. I am thinking about adding a hard-to-see-through aka etched glass door and the word "pantry". Yes, I'm sure it has been done a million times but I have always visioned my pantry like this!

{ midwest manufacturing }

I'm sure the door above is pretty pricey so I bet we will end up buying an inexpensive glass door, purchasing the 3m film and then use a stencil of some kind to write out pantry.

Next to the new pantry we have another storage closet. We are taking this out (pushing the new pantry wall in a foot or two) and converting this area into a mudroom. If you have kids and a messy husband with all of his army gear you know this is a must to any home! I really adore the EasyCloset system. Since Daniel is handy we can get a California System without the marked up price. In fact our Master Closet has an EasyCloset installed.

Please excuse the 2 year old iPhone picture quality!

{{ my side }}

{{ his side }}


{{ back of closet }}

I will document the changes and selections for tile/wall color/cabinets etc. I don't expect this project to take very long. We are working with professionals that will come in and knock this job out quickly.

This will set us back a couple dollars. But I feel DIYers + lint build up = fire. It is best to leave this type of a remodel to the professionals.

Furniture Hardware Update

It is so like me to be bored with a blog template after less than a week and then change it! I have a feeling I'm going to be changing my design/layout until I find the perfect design for my style!!

Well back to blog land ---
For the baby room I selected furniture from JC Penney. The exact furniture can be found here. The reviews for this product are great. I knew I had to try it. Our home entertainment furniture is from JC Penney, and it had great reviews as well - and honestly, I can't tell the difference between it and the Pottery Barn Logan Media set.

The only downfall to this item was the fact that the knobs are the same color as the furniture. Blah and boring in my opinion. I wanted to jazz it up with a splash of metal. We selected this knob.

:: Brainerd  1-1/2" Ringed Knob ::


Now, I think the furniture looks complete!

:: before - old knob on the left ::

:: after ::


:: perfect location while the room gets ready (upstairs loft) ::

Oh and I snagged those stuffed animals on Zulily for really cheap. Evelyn spotted them so I think they now belong to her...

I'm hoping to get all of the furniture moved in the baby room by Friday (yay, this means that the wainscotting is finished!!) After that we will be busy installing the new closet system for the walk in closet in the room. I think we are going with the closet system that is on display at Lowes...Oh how I completely despise the builder grade wire closet system.


Harrison's Room Progress

Daniel has been working hard trying to get the room ready for me to decorate. All of the wainscotting is up and we are almost ready to get the crib together and move the furniture in the room.

:: we are making some progress! ::

:: another shot ::

I finally picked knobs that I like for the furniture. I decided to go with a simple knob. Initially, I wanted to use the cup pulls but they just didn't look right with our furniture.

We ended up putting an extra $75 into the dressers by going with the nicer knobs. I think it is well worth it (pictures of the dresser tomorrow!!)

Don't forget to follow and leave a comment for this months giveaway! Be sure to leave a comment on the giveaway page, not here!


April Giveaway


I am caving! There are so many wonderful things I want to share with all of you so I am going to do a giveaway. Without further adieu, the April Giveaway...


1. {spring is in the air print}

2. {5 bird tweet note cards with envelopes}


3. {white flower clip}


4. {bird hand towel}

5. {pinwheel thank you card with envelope}


6. {pinwheel}


A random winner will be selected on [April 20th]

You can enter this giveaway several different ways...

- Follow the blog [the winner must be a follower] -


- Leave a comment at the end of this post -

- For extra entries post a link to my blog on facebook. -

Please leave a message so I know to include your extra entries.

Good luck!

----------------------

UPDATE
Congrats to


Pinwheel Thank You Cards: Tutorial

Earlier I mentioned that my creativity started with Evelyn's pinwheel invites. These invites are very simple to construct and can be made into invitations for any kids birthday --- or even thank you cards. The possibilities are endless what you can use these type of cards for! I have updated the design to show you a thank you card.


Materials you need:

:: Card stock (one white, and one with a fun design on both sides) ::
:: Sheet of white text paper ::
:: Glue ::
:: Scissors ::
:: Printer ::
:: Template ::


[Step One] Cut out your double sided designed card stock to measure 10" x 7".

[Step Two] Print the PDF template on the white card stock and cut along the dotted lines. {I have created a template for you to print out custom thank you cards.} You will need the most recent version of Adobe reader to view the PDF files. You can download Adobe for free here.

[Step Three] Making the pinwheels are very simple. Cut out {3} 2" x 2" squares of your fun design scrap paper. Cut the square on the corners roughly 1.25" in at a 45 degree angle on all sides. Fold one point in at each of the corners. When they all meet in the middle push the brad through the pinwheel. I suggest using a sharp tool to make the hole for the brad.


:: ignore my nails!! ::


[Step Four] Glue the white card stock with the PDF template and layer it on the designed card stock.

[Step Five] Attach the pinwheels on the card next to each other...

[Step Six] Fold the card in half.

[Step Seven] Cut a 4.5" x 6.5" piece of white text paper and glue it to the inside of the card.


You are finished. That is all you need to do to make a super cute card that can be used for a variety of things!

Enjoy!

**This card will be featured in the April Monthly Giveaway so if you aren't arts and crafts savvy you will have a chance to have a card of your own!**

Baby Room

Baby Harrison will be here some time the end of July. Actually due on my dear friend, Meggy's birthday. I have been gathering ideas on doing a neutral sophisticated baby room. I want to design something that he can grow with.

I will be posting in the upcoming weeks the progress of the room. Husband is working hard getting the room ready for me to design. He is putting up wainscoting and making sure I am happy (oh how I love being pregnant!) Wainscoting is something I'm in love with and we will show you how to make your own "faux" wainscoting for a fraction of the price and all of the wow!

We are going to splurge on our seating (probably buy from Pottery Barn Kids.) This will grow with the room - and by keeping it neutral if he gets sick of the chair in there we can always move it to another spot in the house.

Our JC Penney furniture arrived last night and WOW, I am extremely impressed. I knew I was taking a chance but I'm not kidding, the structure/quality of this particular brand is far superior than Pottery Barn Kids or Land of Nod.

So far, we have spent roughly $1200 on the baby room. This number includes: furniture (crib, dresser, tall dresser,) paint, and wainscoting. The overall goal is to keep everything under $2500. I know that price sounds steep but we are buying bedroom furniture that Harrison will be able to use way in his teen years (the crib converts to a full size bed.)

Tip: Make an inexpensive piece of furniture (ie dresser) look expensive by investing in different handles. This can turn my inexpensive $400 dresser to rival those at Restoration Hardware ($1200) and Pottery Barn Kids ($899.)

Evelyn's First Birthday

My daughter inspires me to do what I love. It all started a few months before her 1st birthday (June 2010.) Like other mothers, I wanted the best birthday party (and unique decor) for my daughter.

As most people, I started browsing the internet trying to find the perfect theme. I found nothing. I wanted this to be original just like her. [[when she was born she had a full head of thick hair and looked like no other baby I have ever seen]] ha, maybe I'm partial because she is my baby!


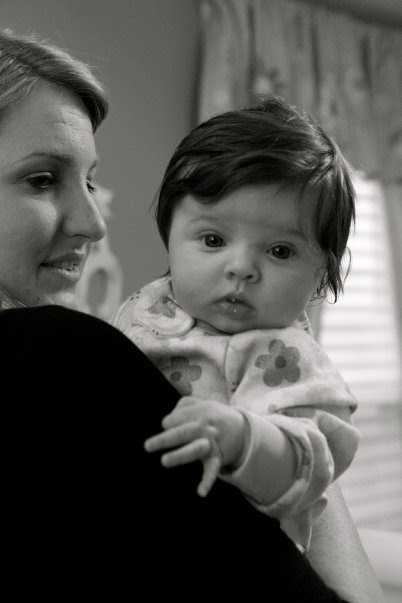
:: evelyn at 4 months ::

Anyways, I decided to expand my search and I started looking on wedding websites. I know, I am that crazy mother. I came across the pinwheel theme for a wedding. I was in love. This was it. I knew exactly what I was going to do for her first birthday. Tons of pinwheels, lots of pink, and custom invitations.

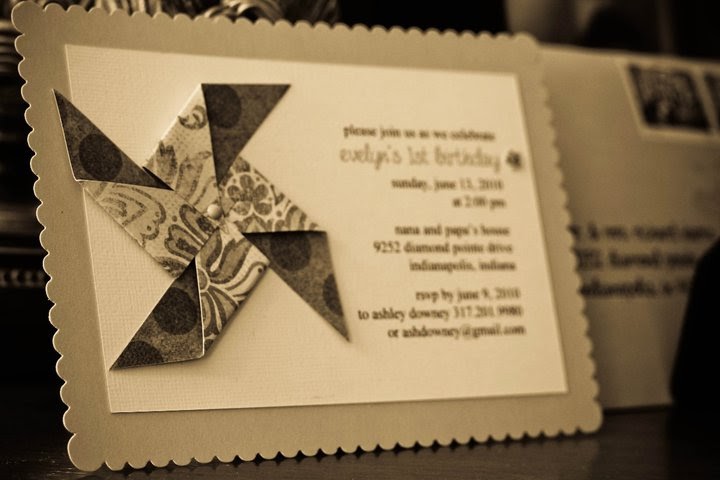
I started the pinwheel theme with the invitations.


:: color invite ::

:: sepia invite ::

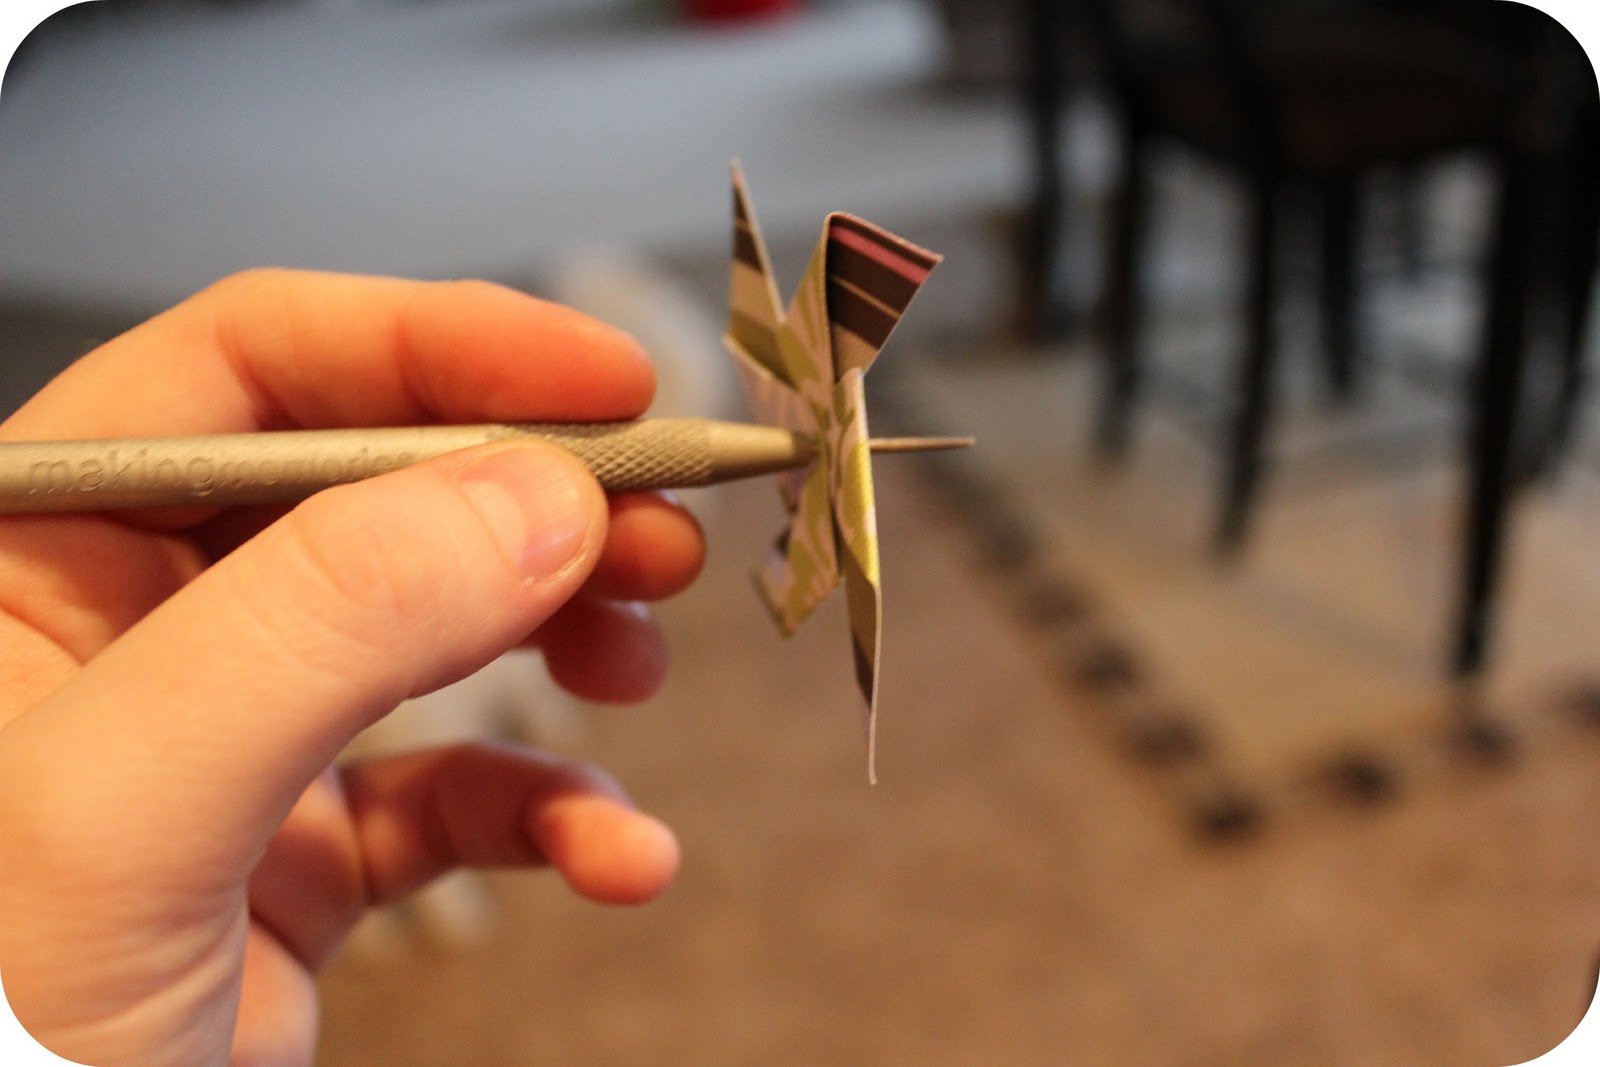
I created pinwheels and attached them to basic card stock that I bought at the local craft store. I embellished the invites with gems to give it that extra punch - because yes, little Miss Evelyn is a princess after all! The envelopes were embossed with butterflies to give it an extra special feel.


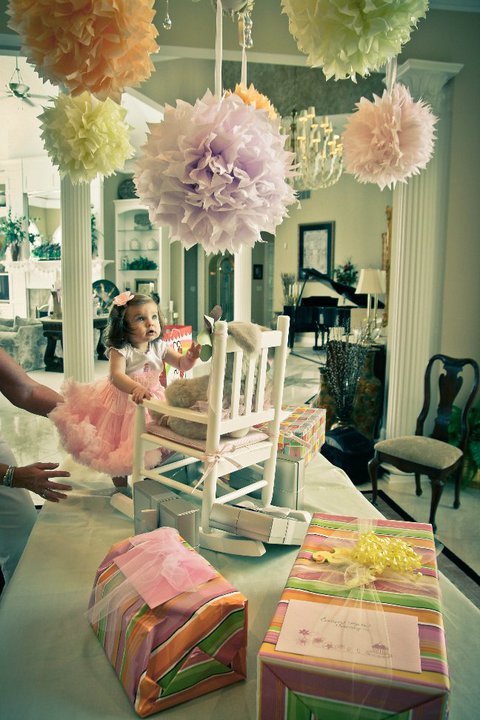
:: entrance to the party ::

Like most weddings today, the tissue paper puffs are a big hit. I also included these in the decor by hanging them from the chandelier. This was a very inexpensive way to add details to her party. Oh, and she loved them!


:: looking at her tissue puffs ::


The most time consuming part of the party was making all of the cupcake toppers. Since, I was going for a pinwheel theme, I decided to just top the cupcakes with them.

:: pinwheels in cupcakes ::


I also created a banner to display her name...


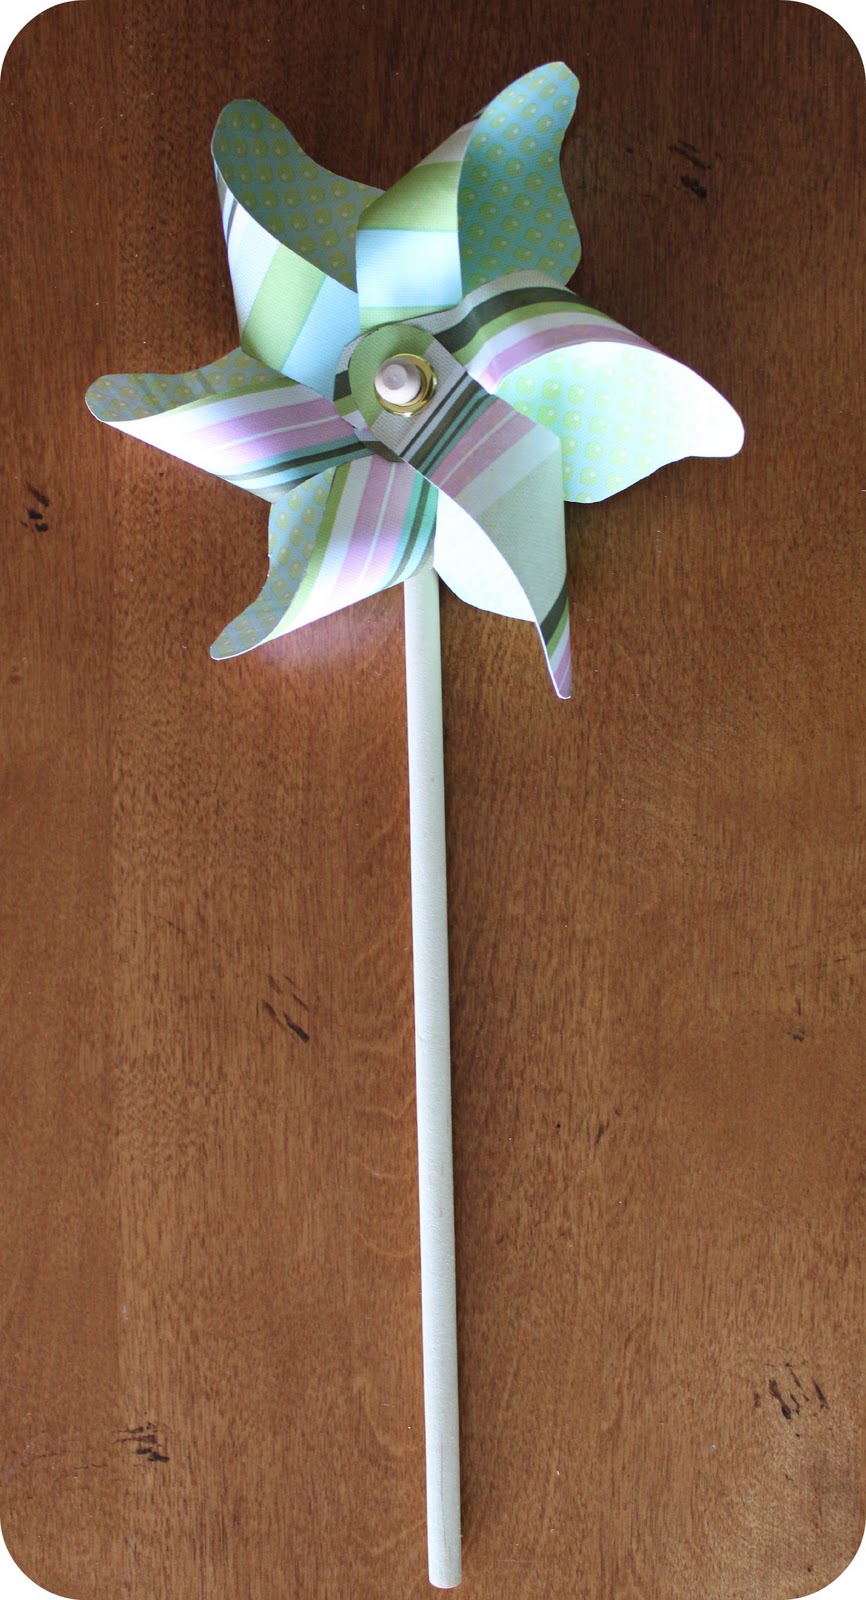
I even made pinwheels for all of the kids (and parents) to take as a gift.


I believe she truly loved her party...well atleast mom will remember and enjoy the decorations!


Happy 1st Birthday! (eeeee...10 months ago)


Our new addition will be here summer of 2011 making our family of 3 a family of 4. I hope to live up to this birthday party when Harrison arrives!


Special thanks to Jes @ JS Squared for her amazing photography. For more information you can visit her at http://jssquared.blogspot.com/.


Related Posts Plugin for WordPress, Blogger...