I designed my blog. Well, kinda...I basically added a few buttons on the side bar, a header, and a fancy background to the basic blogger template.
Many of you asked how I created the blog buttons on the side of my blog.
I made a tutorial so you can create nifty unique buttons for your blog using Microsoft Paint.
Microsoft Paint is very easy to use and I find it to be the most user friendly for people that aren't experienced in fancy programs such as Adobe Illustrator.
For this tutorial we are going to create this button:
{feel free to use any of the buttons in this post for your blog...just please make a note somewhere on your blog where you got the buttons!}
{Step One} Copy this blue linen background...to do this hover over the image, right click the mouse and select copy.
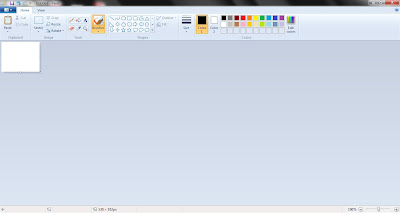
{Step Two} Open Microsoft Paint.
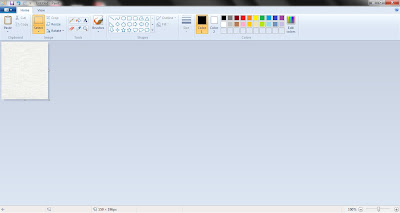
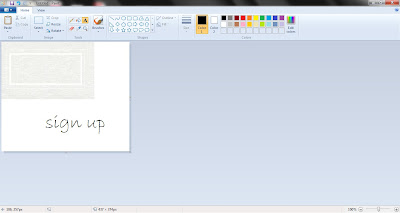
{Step Three} Right click on the mouse in the Microsoft Paint program and select paste.
{Step Six} Go to the line tool and select the second thickest line.
{Step Seven} Select the box tool and create a rectangular box. Be sure to select the color to be white. I basically eyeballed this to be roughly 2.5in x 1.5in.
{Step Eight} Go to the line tool again and select the thinnest line. This will be the outermost box.
{Step Nine} Create a thin line box outside of the thick box. Be sure to select the color to be white. Once again eyeball it to be even around the innermost box.
{Step Ten} Create a text box somewhere in the white area on the canvas.
{Step Eleven} Select a font, any font to create your tab. For this tutorial I used Bradley Hand ITC. I also made it size 48 font.
{Step Twelve} Click the dashed rectangular box (sorry I don't know the technical Paint terms). Create a box around the text you just typed. Be sure that transparent is selected.
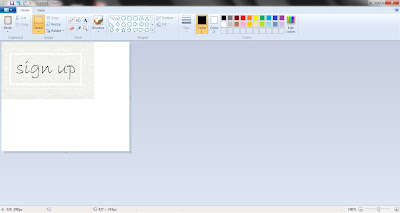
{Step Thirteen} Drag the text to the center of the white boxes you made earlier. Again, a lot of eye balling here...It is going to be imperfectly perfect!
{Step Fourteen} Click on the dashed rectangular box again, but be sure that the transparent button is NOT selected and make a box around the entire sign up button and overlap the blue linen.
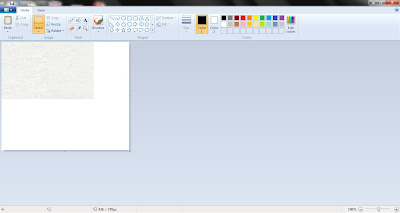
{Step Fifteen} Move this rectangle over to the uppermost left corner.
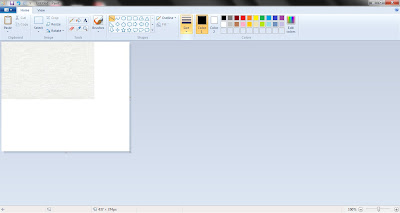
{Step Sixteen} Drag the corners of the white canvas in and even out the sides.
There you go! Sorry for all of the steps. I hope this helps you create amazing side bar buttons for your blog. Below I have included several more tabs you can use on your blog!
You can use different backgrounds to match your blog. Just try some free clipart sites...or google fabrics.
I will have a tutorial in the future for making a custom header.
The winner of the May Giveaway is...
Cupcake Couture
Please email me at evelynkatedesigns@gmail.com with your address and your initials for the custom notecards.












hi ashley,
ReplyDeletei have a mac and don't have paint... i'd like to follow your tutorial and create my own buttons, but i'm not sure how to without paint. got an ideas? i am also dying to see how to create my own header. thanks for sharing your knowledge. i want to make my blog unique.
Tara
Hi Ashley,
ReplyDeleteI'm in the same boat with Tara, I have a Mac too - any thoughts on how to create buttons using a Mac?
Thanks!
Katie
Hi girls, I'm not sure how you do this on a Mac but I will research it to see what I can figure out! I use to work on a Mac in highschool so hopefully I remember some things!!
ReplyDeletethanks Ashley. i have been using the blogger 'help' button for several things lately. so i will research there too. if i find anything i'll post back.
ReplyDeleteTara
OMG i needed that! thanks for sharing
ReplyDeleteTiffany, I blog over at http://itsacowgirlthing.blogspot.com
I love this tutorial... Thank you so much for sharing.
ReplyDeleteI'm starting a new linky party on my blog today and would love if you'd share this there also!
www.daughterbydesign.blogspot.com
Super helpful! I need major help in the area, thanks!
ReplyDeleteSaw this on Whipperberry.
ReplyDeleteExcellent tutorisl - I will be using it for sure!
Lowri
http://papervinenz.blogspot.com/
looks great! thanks for the tutorial :)
ReplyDeleteI have want to change my buttons and I will follow your directions- hopefully I can did it! Thanks for linking to Workshop Wednesday!
ReplyDelete